
Choosing the Right Lash
First, I would recommend starting off in your local drug store or Ulta Beauty store. Both places carry inexpensive brands, so if you’re just delving into the lash experience, you don’t have to worry about breaking the bank in the process of trying something new. The brand I recommend is Ardell Eyelashes. I like Ardell because they are relatively inexpensive, durable and look really nice when applied properly. There are many different brands out here. I say nail down the application of the lashes with the inexpensive brands and then start experimenting with the more expensive brands. I personally love Ardell so I’ve stuck with them.Lash Accessories
There are a few things you will need to make the eyelash magic happen:Glue: I use DUO eyelash adhesive. There are definitely great glue brands out there but DUO is my go-to. It’s inexpensive, available in all your local drugstore and your lashes won’t budge all day when DUO is applied correctly.
Eyelash Applicator: Eyelash applicators are great for beginners! When I first started applying eyelashes I tried using tweezers and found it to be really difficult and gave up on them. I used my hands, a little easier than the tweezers but still challenging for a beginner. I recently started using the eyelash applicator and that has cut my application time down tremendously! Definitely buy one if you don’t have one. Ulta sells them for $10.00 or you can purchase an eyelash kit that includes the applicator with your lashes.

Magnifying Mirror (optional): I would recommend using a magnifying mirror. This mirror is great for making sure you’ve applied your lashes directly on the lash line. You don’t need this but I recommend it. This mirror will come in use for other beauty related needs like plucking your eyebrows, blackhead removal and many other skin purifying regiments.
Applying
1. Complete your makeup look first. Your lashes should be the last step to your finished look. Make sure you are wearing eyeliner. The eyeliner helps hide the false lash. Eyeliner width is based on personal preference, but don’t forgo it!
2. Sit down in front of your mirror. Have your lashes, glue, applicator, tweezers or fingers (whichever works best for you) and mirror in front of you. You first want to pull your lashes off the container, bend to the shape of your eye and hold with your applicator.
3. Once you’ve got a good grip on your lashes, apply the glue to the top of the lashes. Allow the glue to dry for about 30 seconds before applying to your lash line. I normally blow on it or wave for quick drying. (Note: sometimes your applicator will stick to your lash because of the adhesiveness of the glue. If you find that happening just wipe the applicator down with alcohol before using again).
4. Place the center of your lashes on the center of your lash line first. Hold firmly there for a few seconds. Then remove the applicator. Your lash should stay in place (if you allowed the glue to dry for 30 seconds). Then with your fingers or the applicator, position the corners of the lash one at a time. Hold in place for a few minutes for drying and then do the same to the other side (Note: the lashes should be laying on the lash line NOT your eyelid, if your lashes are laying on your eyelid it won’t look natural. This can be the most challenging part of the process and will require practice. This is where the magnifying mirror will come in handy!)
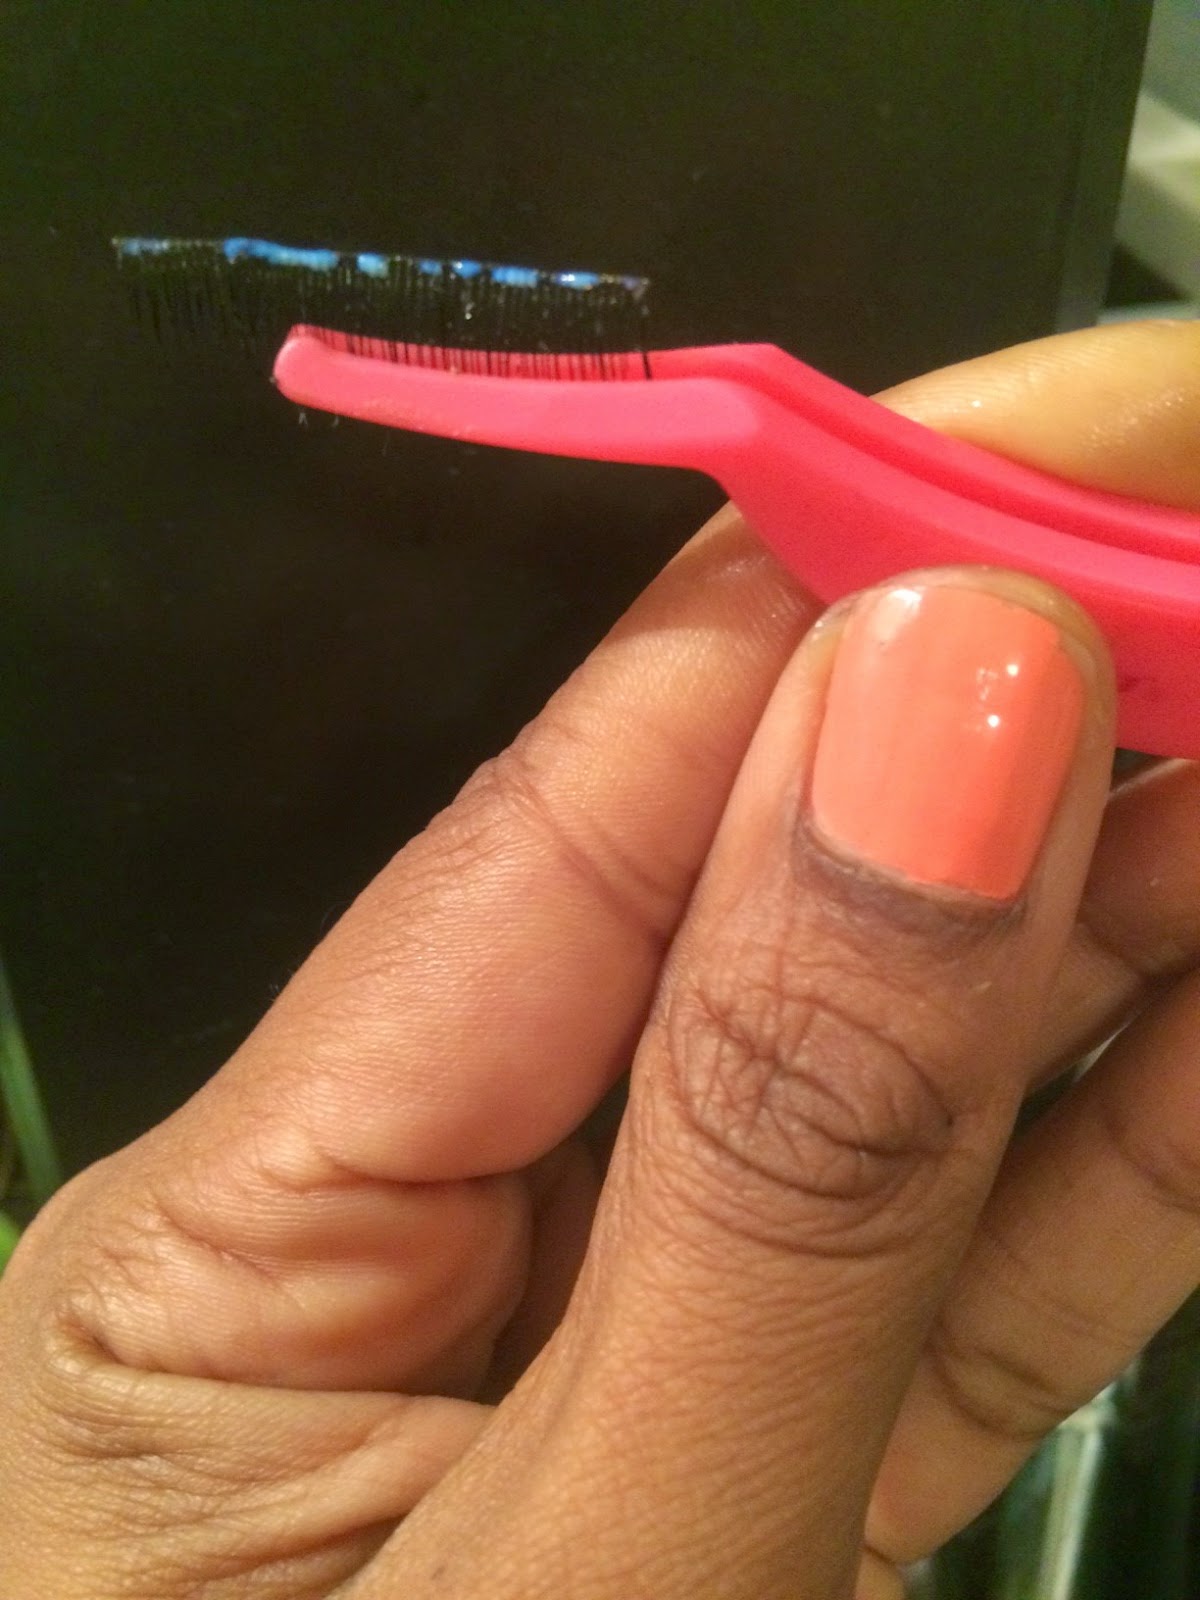
 |
| In this photo the lash is slightly stuck but not sealed to the lash line |
5. Once you’ve got all areas of the lashes laid down, you will want to take your tweezers and gently squeeze your lash and the false eyelash together to confirm the seal. If you are not feeling totally comfortable with the seal put a dab of glue on top of each corner and let dry. You won’t need this extra step once you’ve applied a few times. (Note: the edges can be tricky. You want to make sure you’ve applied enough glue on the edges and achieved a good seal otherwise your lashes will begin to rise during the course of the day – Not cute ladies! LOL)
6. Lastly, put on your favorite mascara to blend your natural and false lashes together.
Voila! You should have bold, beautiful eyes for your workday, evening out or quiet day! The first time I tried lashes I applied them on my day off just lounging around the house. I wanted to see if I applied them correctly, if they would stay on all day and what I needed to do to improve the process. It worked out well. It will take practice but don’t worry you will get it! (Note: lashes are reusable; you just need to clean them – Stay tuned for blog/vlog on cleaning your eyelashes).
 |
| Very Natural Lash - #330 Ardell Lashes |
Nice! I'll check out ultra, I was using the applicator all wrong...lol
ReplyDeleteRita, thanks for your comment! I'm glad you
Deleteyou found this post helpful! We just uploaded the video! Definitely check it out.